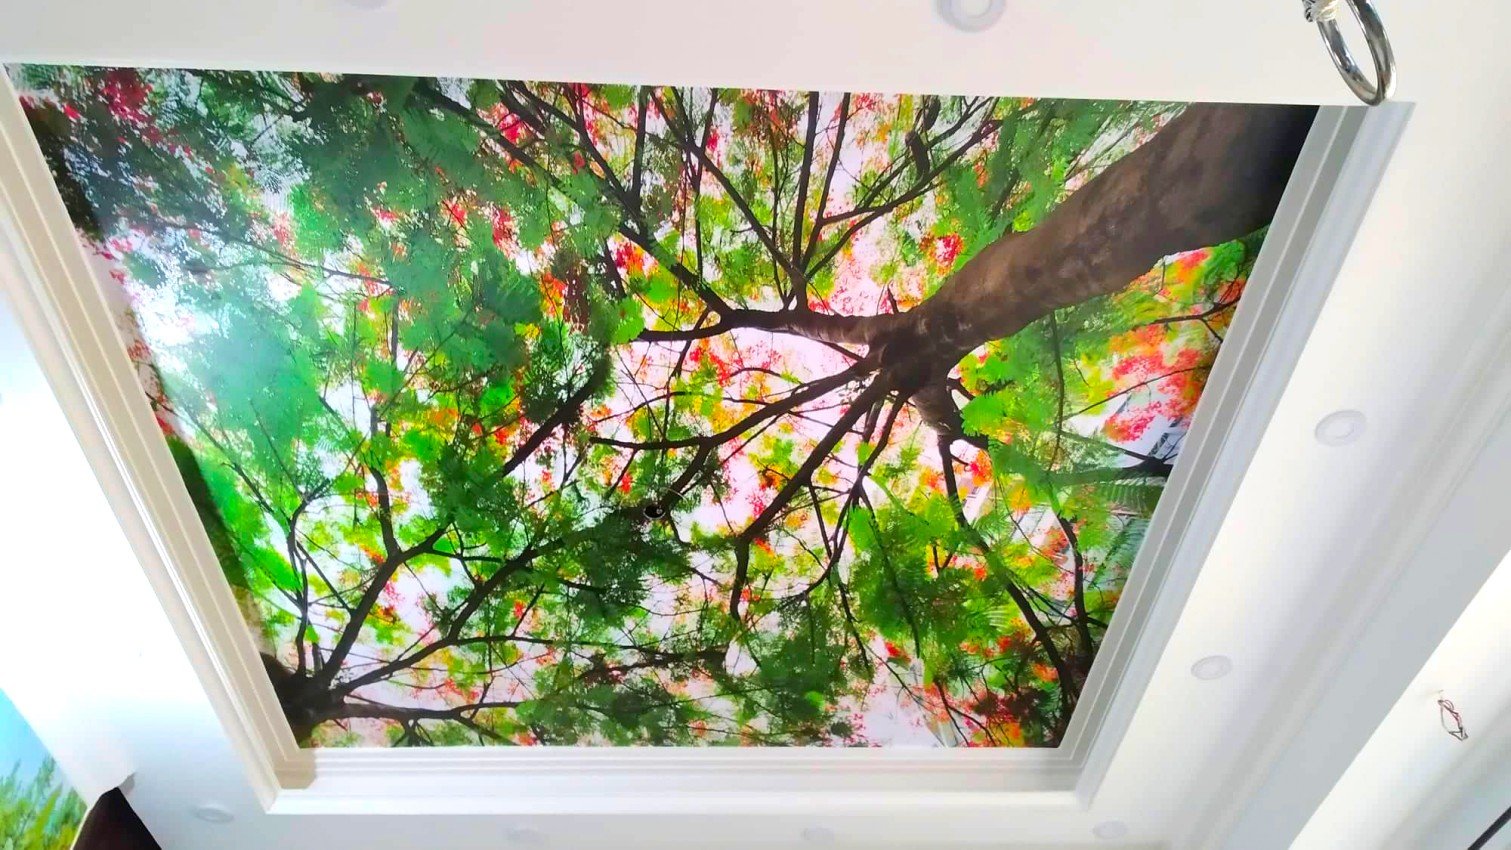
Installing 3D ceiling paper on your ceiling can add a unique and eye-catching element to your room. If you're considering installing this type of wallpaper, it's important to do it properly to ensure a seamless and professional-looking finish. In this article, we'll go over the steps you need to take to install 3D ceiling paper on your ceiling. Please follow this steps for better finishing for install ceiling paper on your top.
1. Gather your supplies
Before you begin, it's important to gather all the supplies you'll need for the job. Here's what you'll need:
- 3D ceiling paper
- Measuring tape
- Scissors or utility knife
- Adhesive
- Paint roller
- Paint tray
- Drop cloth or plastic sheeting
- Ladder
- Protective gloves and safety glasses
2. Measure your ceiling
The first step is to measure your ceiling to determine how much 3D ceiling paper you'll need. Measure the length and width of your ceiling and multiply the two numbers together to get the square footage. Be sure to add an extra 10% to account for any waste or mistakes.
3. Prep the area
Once you have your supplies and measurements, it's time to prep the area. Remove all furniture and accessories from the room and cover the floors with a drop cloth or plastic sheeting. You should also turn off the power to any electrical outlets and remove any light fixtures or ceiling fans.
4. Apply the adhesive
The next step is to apply the adhesive to the back of the 3D ceiling paper. Be sure to follow the manufacturer's instructions for the type of adhesive you're using. Some adhesives may need to be mixed with water, while others may be ready to use straight from the container. Use a paint roller to apply the adhesive evenly to the back of the paper.
5. Position the paper
Once the adhesive is applied, it's time to position the 3D ceiling paper on the ceiling. Start at one end of the room and work your way across, using a ladder to reach the ceiling. Be sure to work quickly to avoid the adhesive drying out. Carefully position the paper, making sure it's straight and aligned with the edges of the ceiling.
6. Smooth out the paper
After positioning the paper, use a wallpaper smoothing tool or a clean, dry cloth to smooth out any wrinkles or bubbles. Be sure to work from the center of the paper outwards, pushing out any air pockets as you go.
7. Trim the edges
Once the paper is smoothed out, use scissors or a utility knife to trim the excess paper from the edges of the ceiling. Be sure to work carefully and avoid cutting too much or too little.
8. Repeat the process
Continue applying the 3D ceiling paper to the rest of the ceiling, working in small sections at a time. Be sure to overlap the edges of the paper slightly to create a seamless finish.
9. Let the adhesive dry
After the paper is installed, it's important to let the adhesive dry completely. This may take several hours, so be sure to leave the room and avoid touching the paper until it's dry.
Tips and Tricks for Installing 3D Ceiling Paper
- Before starting the installation process, be sure to read the manufacturer's instructions carefully. This will help you to avoid any mistakes and ensure a professional-looking finish.
- If you're using a ladder to reach the ceiling, be sure to use caution and follow safety guidelines. Wear protective gloves and safety glasses to avoid any accidents.
- To ensure a seamless finish, be sure to overlap the edges of the 3D ceiling paper slightly. This will help to hide any gaps or inconsistencies.
- If you're having trouble smoothing out the paper, try using a wallpaper smoothing tool or a clean, dry cloth. This will help